How to build simple websites with Flask?
In this tutorial, we are going to learn How to build simple websites with Flask. Before starting the tutorial you must have to install the below things in your desktop/Laptop.
- Install Python 3.6+ and PIP
- Install virtualenv
- Create our project directory
- Create virtual environment
- Install required Python Flask packages
For Python Flask installation refer the Previous tutorial Flask Tutorials- Python Flask MongoDB Setup in Simple Steps. After the successfully installation and now we’re ready to go for development.
First, we need to create the app.py file in our project main directory and we just want to import flask by using “from flask import Flask, render_template” and let’s also import render underscore template.
After that we have to create an app and we call this Flask and it’s just Flask(__name__) creates an app in an instance of flask running creates an app for us now we want to set a route and we’ll just create one app dot route @app.route(‘/’). and then we want this to be the forward slash (/) will redirect to index page or home page.
So now let’s write some logic for this let’s def index so we want to create this index and inside of here we can just return some value or you can return anything. We just return some text “My First Project” and save this and now let’s check in the browser.
from flask import Flask, render_template

app = Flask(__name__)

@app.route('/')
def index():
     return ("My First Project")

if __name__ == "__main__":
    app.run(debug=True)
Here this is our localhost and it’s port 5000 so the flask web server is running on port 5000 it’s listening. We just copy and paste the URL in the browser and just we get My First Project.

So we could go render redirect the HTML template and then point this to index.html now this renders a template. The code below.
from flask import Flask, render_template

app = Flask(__name__)

@app.route('/')
def index():
     return render_template("index.html")

if __name__ == "__main__":
    app.run(debug=True)
Let’s create new folder templates in the project directory and when we do that pops up so now we can create a new file inside of templates and let’s file save as the index.html.
How to Use Bootstrap Library in Python Flask?
Let’s now I am going to use the bootstrap CSS framework to design the index.html.
The bootstrap library
<link rel="stylesheet" href="https://maxcdn.bootstrapcdn.com/bootstrap/4.0.0/css/bootstrap.min.css" integrity="sha384-Gn5384xqQ1aoWXA+058RXPxPg6fy4IWvTNh0E263XmFcJlSAwiGgFAW/dAiS6JXm" crossorigin="anonymous">
<link rel="stylesheet" href="{{url_for('static',filename='css/style.css')}}" >
<script src="https://code.jquery.com/jquery-3.2.1.slim.min.js" integrity="sha384-KJ3o2DKtIkvYIK3UENzmM7KCkRr/rE9/Qpg6aAZGJwFDMVNA/GpGFF93hXpG5KkN" crossorigin="anonymous"></script>
<script src="https://cdnjs.cloudflare.com/ajax/libs/popper.js/1.12.9/umd/popper.min.js" integrity="sha384-ApNbgh9B+Y1QKtv3Rn7W3mgPxhU9K/ScQsAP7hUibX39j7fakFPskvXusvfa0b4Q" crossorigin="anonymous"></script>
<script src="https://maxcdn.bootstrapcdn.com/bootstrap/4.0.0/js/bootstrap.min.js" integrity="sha384-JZR6Spejh4U02d8jOt6vLEHfe/JQGiRRSQQxSfFWpi1MquVdAyjUar5+76PVCmYl" crossorigin="anonymous"></script>
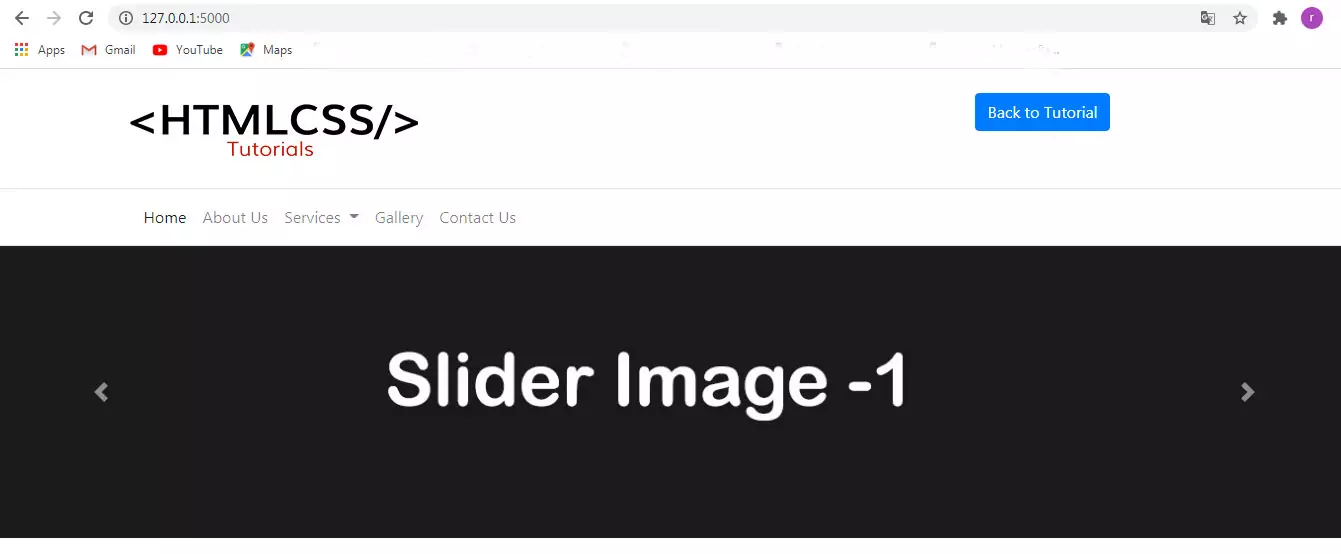
1. Creating Navigation Bar using Bootstrap
<section class="testimonial" style="border-bottom: 1px solid #e6e1e1;">
		<div class="container">
	<nav class="navbar navbar-expand-lg navbar-light">
		<button class="navbar-toggler" type="button" data-toggle="collapse" data-target="#navbarSupportedContent" aria-controls="navbarSupportedContent" aria-expanded="false" aria-label="Toggle navigation">
		  <span class="navbar-toggler-icon"></span>
		</button>

		<div class="collapse navbar-collapse" id="navbarSupportedContent">
		  <ul class="navbar-nav mr-auto">
			<li class="nav-item active">
			  <a class="nav-link" href="#">Home <span class="sr-only">(current)</span></a>
			</li>
			<li class="nav-item">
			  <a class="nav-link" href="#">About Us</a>
			</li>
			<li class="nav-item dropdown">
			  <a class="nav-link dropdown-toggle" href="#" id="navbarDropdown" role="button" data-toggle="dropdown" aria-haspopup="true" aria-expanded="false">
				Services
			  </a>
			  <div class="dropdown-menu" aria-labelledby="navbarDropdown">
				<a class="dropdown-item" href="#">Service-1</a>
				<a class="dropdown-item" href="#">Service-2</a>
				<div class="dropdown-divider"></div>
				<a class="dropdown-item" href="#">Service Heading</a>
			  </div>
			</li>
			<li class="nav-item">
			  <a class="nav-link" href="#">Gallery</a>
			</li>
			<li class="nav-item">
				<a class="nav-link" href="#">Contact Us</a>
			  </li>
		  </ul>

		</div>
	  </nav>
	</div>
</section>
2. Adding Bootstrap Slider
The HTML Code Below
<div id="slider" class="carousel slide" data-ride="carousel">
	<div class="carousel-inner">
	  <div class="carousel-item active">
		<img class="d-block w-100" src="{{url_for('static',filename='images/slider-1.jpg')}}" alt="First slide">
	  </div>
	  <div class="carousel-item">
		<img class="d-block w-100" src="{{url_for('static',filename='images/slider-2.jpg')}}" alt="Second slide">
	  </div>
	  <div class="carousel-item">
		<img class="d-block w-100" src="{{url_for('static',filename='images/slider-3.jpg')}}" alt="Third slide">
	  </div>
	</div>
	<a class="carousel-control-prev" href="#slider" role="button" data-slide="prev">
	  <span class="carousel-control-prev-icon" aria-hidden="true"></span>
	  <span class="sr-only">Previous</span>
	</a>
	<a class="carousel-control-next" href="#slider" role="button" data-slide="next">
	  <span class="carousel-control-next-icon" aria-hidden="true"></span>
	  <span class="sr-only">Next</span>
	</a>
  </div>
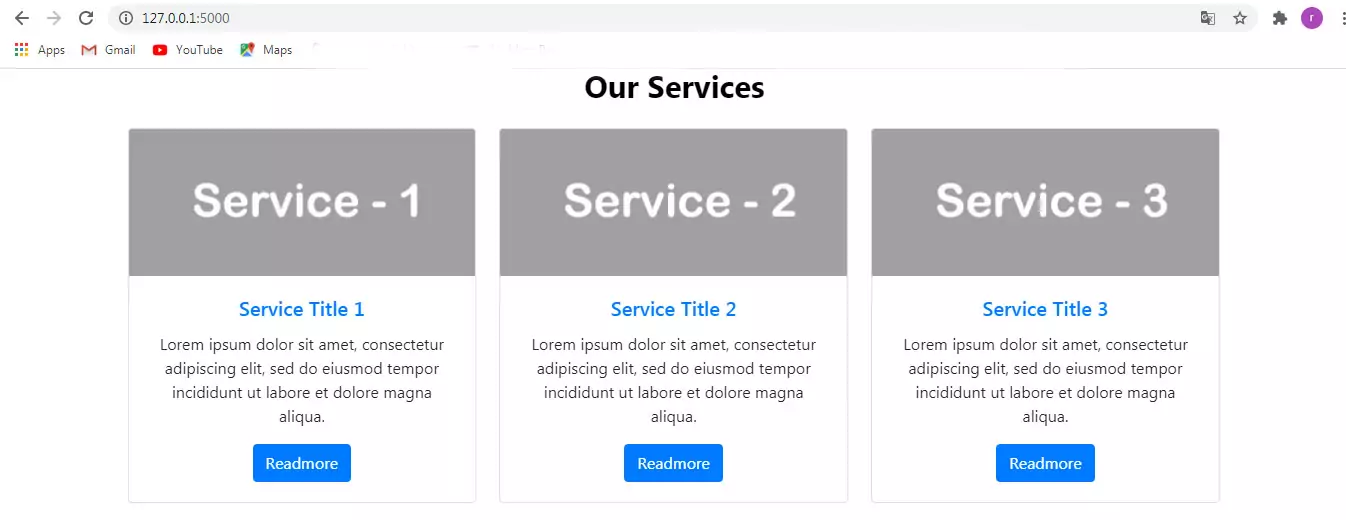
3. Creating Service Block
Creating the service block using Bootstrap Card. The HTML code below.
 <section class="testimonial py-3" id="testimonial">
	<div class="container">
		<div class="row">
			<div class="col-md-12 py-3">
				<h2 class="serviceHeading">Our Services</h2>
			</div>
		</div>
			<div class="row">
				<div class="card card-dg">
					<img class="card-img-top" src="{{url_for('static',filename='images/service-1.jpg')}}" alt="Card image cap">
					<div class="card-body">
					  <h5 class="card-title"><a href="#">Service Title 1</a></h5>
					  <p class="card-text">Lorem ipsum dolor sit amet, consectetur adipiscing elit, sed do eiusmod tempor incididunt ut labore et dolore magna aliqua.</p>
					  <div class="readmore"><a href="#" class="btn btn-primary">Go somewhere</a></div>
					</div>
				  </div>

				  <div class="card card-dg">
					<img class="card-img-top" src="{{url_for('static',filename='images/service-2.jpg')}}" alt="Card image cap">
					<div class="card-body">
					  <h5 class="card-title"><a href="#">Service Title 2</a></h5>
					  <p class="card-text">Lorem ipsum dolor sit amet, consectetur adipiscing elit, sed do eiusmod tempor incididunt ut labore et dolore magna aliqua.</p>
					  <div class="readmore"><a href="#" class="btn btn-primary">Go somewhere</a></div>
					</div>
				  </div>

				  <div class="card card-dg">
					<img class="card-img-top" src="{{url_for('static',filename='images/service-3.jpg')}}" alt="Card image cap">
					<div class="card-body">
					  <h5 class="card-title"><a href="#">Service Title 3</a></h5>
					  <p class="card-text">Lorem ipsum dolor sit amet, consectetur adipiscing elit, sed do eiusmod tempor incididunt ut labore et dolore magna aliqua.</p>
					  <div class="readmore"><a href="#" class="btn btn-primary">Go somewhere</a></div>
					</div>
				  </div>

			</div>
		</div>
	</section>
4. Creating Our Work section
<section class="know py-5">
			<div class="row">
				<div class="col-md-5 py-3">
					<h2 class="serviceHeading" style="margin-bottom: 35px;">Our Work</h2>
					<div class="progress">
						<div class="progress-bar bg-success" role="progressbar" style="width: 25%" aria-valuenow="25" aria-valuemin="0" aria-valuemax="100"></div>
					  </div>
					  <div class="progress">
						<div class="progress-bar bg-info" role="progressbar" style="width: 50%" aria-valuenow="50" aria-valuemin="0" aria-valuemax="100"></div>
					  </div>
					  <div class="progress">
						<div class="progress-bar bg-warning" role="progressbar" style="width: 75%" aria-valuenow="75" aria-valuemin="0" aria-valuemax="100"></div>
					  </div>
					  <div class="progress">
						<div class="progress-bar bg-danger" role="progressbar" style="width: 100%" aria-valuenow="100" aria-valuemin="0" aria-valuemax="100"></div>
					  </div>
					<p class="py-5">Sed ut perspiciatis unde omnis iste natus error sit voluptatem accusantium doloremque laudantium, totam rem aperiam, eaque ipsa quae ab illo inventore veritatis et quasi architecto beatae vitae dicta sunt explicabo. Nemo enim ipsam voluptatem quia voluptas sit aspernatur aut odit aut fugit, sed quia consequuntur magni</p>
					<div class="readmore"><a href="#" class="btn btn-primary">Readmore</a></div>
				</div>
					<div class="col-md-7">
						<img class="card-img-top" src="{{url_for('static',filename='images/side-images.jpg')}}" alt="Side Images">
					</div>
			</div>

</section>
5. Create Footer
	<footer class="footer">
		<div class="container">
		  <span class="footer-text">Copyright © 2021 HTMLCSS3 TUTORIALS.</span>
		</div>
	  </footer>
Conclusion
Hope this tutorial will help you to create a simple website using Python Flask, Bootstrap fame work. So please like and share.


